With the NFT bull market in full force, it’s time to help you guys work on a bit of security by setting up your Ledger wallet on MetaMask. We all love our NFTs that go up in value, and it would be a shame if we lose our digital assets by getting hacked or by being uncareful. Let’s prevent this by using a hardware wallet, okay?
In this blog, I’ll guide you through setting up your Ledger wallet on MetaMask. You can also set up other hardware wallets like Trezor. However, this one is specifically designed for my personal favorite wallet, Ledger.
To set this up, you’ll need about 15-30 minutes and you’re good to go.
If you don’t have a MetaMask yes, follow this tutorial to get started on that.
Getting started with a Ledger Wallet on MetaMask
For the purpose of the blog, I purchased a brand new Ledger Nano X. Honestly, I still love my old Nano S, which has a nostalgia feeling to it. However, I like the robust feeling of the new Nano X and I’m looking forward to installing it and starting using it to trade NFTs.
Let’s dive right into the good stuff.
Step 1 – Set up your Ledger Wallet
The first thing you want to do is install Ledger Live. This is a software program that you will use for setting up your Ledger wallet, installing applications on the hardware device and you can manage your funds from there as well.
Once installed, select the device you own to continue.
In the next window, the top choice is to set up a new device. This will guide you through the steps from plugging in your hardware wallet, setting up an 8 digit pin code. Plus proving you with a seed phrase (or private key).
Not your keys, not your coins. Remember that.
Make sure to store this seed phrase in the most secure location you can think of. Don’t hide it under your bed, or in your wife’s sock draw. No, you put it in a locked safe, or ideally, you cut the seed phrase into multiple pieces and lock them at separate locations.
Step 2 – Install Apps
Now that your Ledger is set up, you need to install the applications of the currencies you use.
Open your Ledger Live, connect your Ledger Wallet, and head over to the manager section. Pick the currencies or blockchains you want to install on the hardware wallet. For the NFT collectors, this will most likely be Ethereum.
Step 3- Connect Ledger with MetaMask
We’re almost there. Just hang on tight and you’re ready to safely store your valuable NFTs and crypto.
The last step in this setup is to connect MetaMask with your Ledger wallet.
Follow these steps:
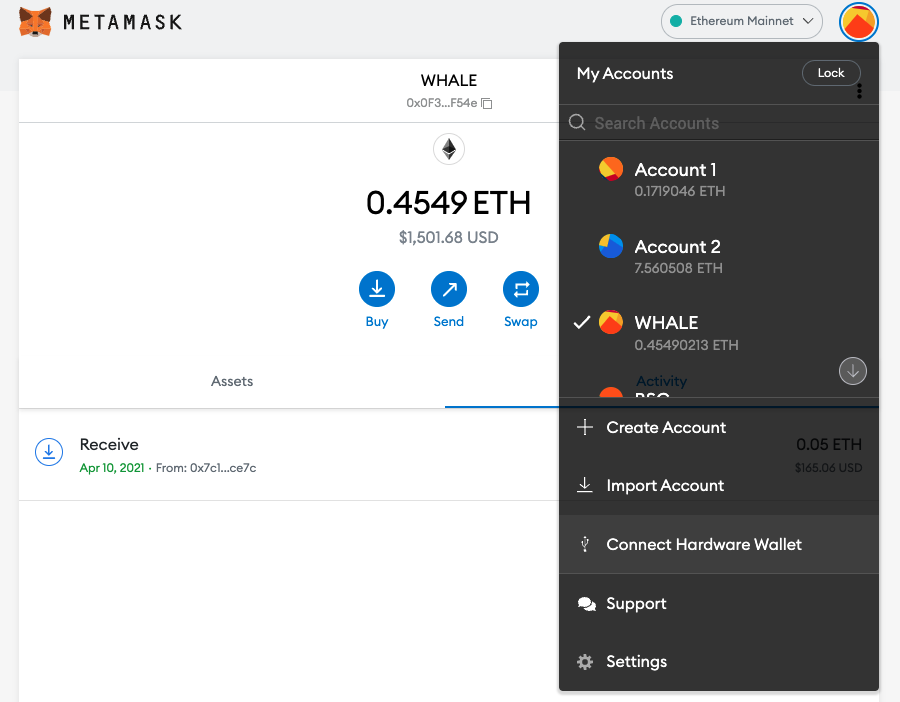
Open your MetaMask in your browser
Select your account in top right corner
Click on “connect hardware wallet”
In the next window, you select the hardware wallet of your choice and click on “continue”.
Make sure that during this step, your Ledger Wallet is connected to your computer, and you have opened the Ethereum app on the device.
Once you have completed this correct, you will now find a Ledger account on your Ledger:
If you run into any issues during this setup, please check the Ledger support page to find your issue.
Hot & Cold Wallet Accounts
As you can see in the screenshot above. I use several hot wallet accounts on my MetaMask. Adding the Ledger Wallet, just means I added another account that is better secured.
I can still use the other hot wallets when I need to. However, whenever I use the Ledger account, I will need to confirm the transactions on my device. Easy peasy.
Final Thoughts
Needless to say, online security is important. I’ve seen dozens of stories of NFT collectors who lose their precious Bored Ape, which is worth hundreds of thousands of dollars. This could have been prevented by simply storing them on a Ledger Wallet.
It’s harder to collect the retroactive airdrops that are growing like wildfire. Several free airdrops are distributed to the NFT community based on trading volume on Opensea or the Ethereum network. Smart collectors that use hardware wallets struggle more claiming these.